If you just got your mirrorless or DSLR camera, you have probably wondered what’s the best camera mode to shoot in.
Short answer, it depends on your scenario. Most people choose between Shutter Speed Priority and Aperture Priority, so let’s see which one is better for you.
1. What is Shutter Speed Priority Mode?
When shooting in Shutter Priority mode, you’re only controlling the shutter speed (no way!).
Your camera handles the other 2 most important settings, aperture and ISO. You’re free to select your own picture profile, focus points, white balance and so on.
What is shutter speed and what does it do?
- A fast shutter speed brings in very little light, and will make your subject appear frozen. It’s great for action (sports, wildlife).
- A slow shutter speed is ideal for low-light, or whenever you want to blur the movement of your subject. This is most common in astrophotography (star trails) or waterfalls.
Because changing the shutter speed also changes your exposure, this camera mode is ideal if you don’t have enough time or knowledge to properly adjust aperture and ISO. Otherwise, your images can end up too bright or dark.
If you want to learn everything about shutter speed, here’s our tutorial for beginners.
2. When to Use Shutter Speed Priority Mode
These are just some of my top recommendations, but many people use Shutter Speed Priority for pretty much everything they photograph.
Choosing the right shutter speed is highly related to the sharpness of your images, so don’t forget to check out our 15 tips for getting sharp photos.
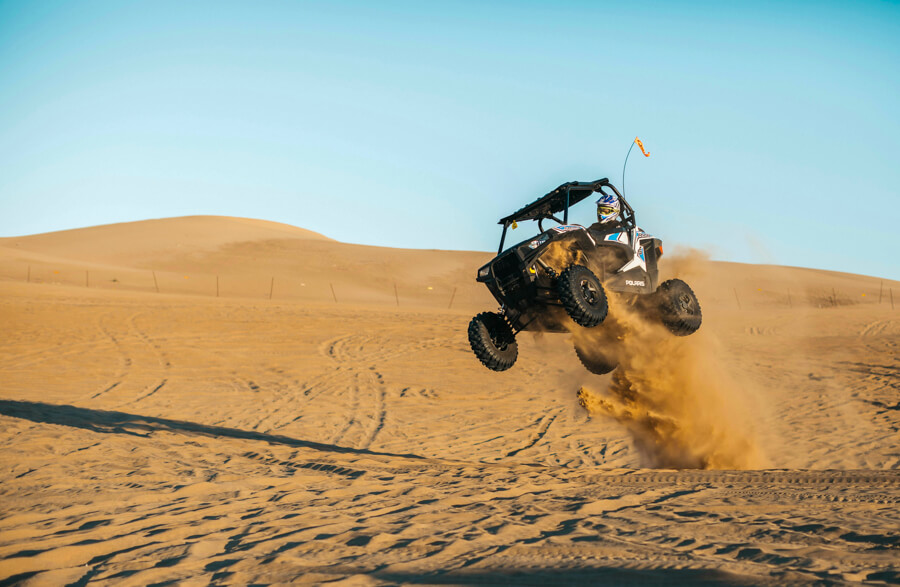
Sports & Wildlife
To freeze fast paced movement, your shutter speed needs to be at least 1/500. Anything slower and you risk having your subject blurred.
The faster your shutter speed, the more light you need. 1/500 is okay for sunny outdoor days, but will be problematic for indoor arenas or early morning wildlife sessions.
Shutter Speed Priority mode is great for this; you worry about making it’s fast enough to freeze motion, while the camera works on getting a proper exposure.
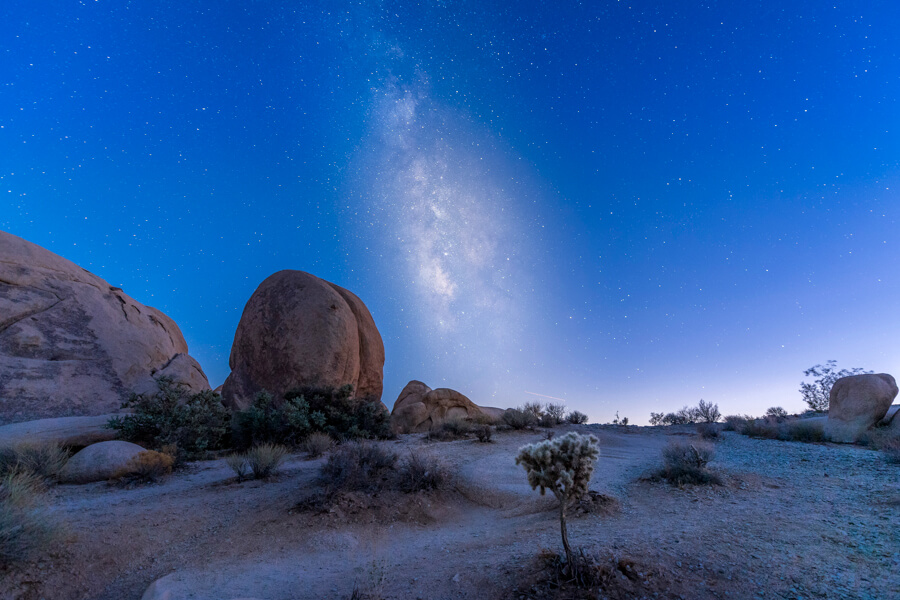
Astrophotography
Astrophotography is done with shutter speeds of at least ~15 seconds, sometimes even a couple of minutes/hours.
You need a tripod for this type of photography, and preferably a wireless remote/phone app to take pictures.
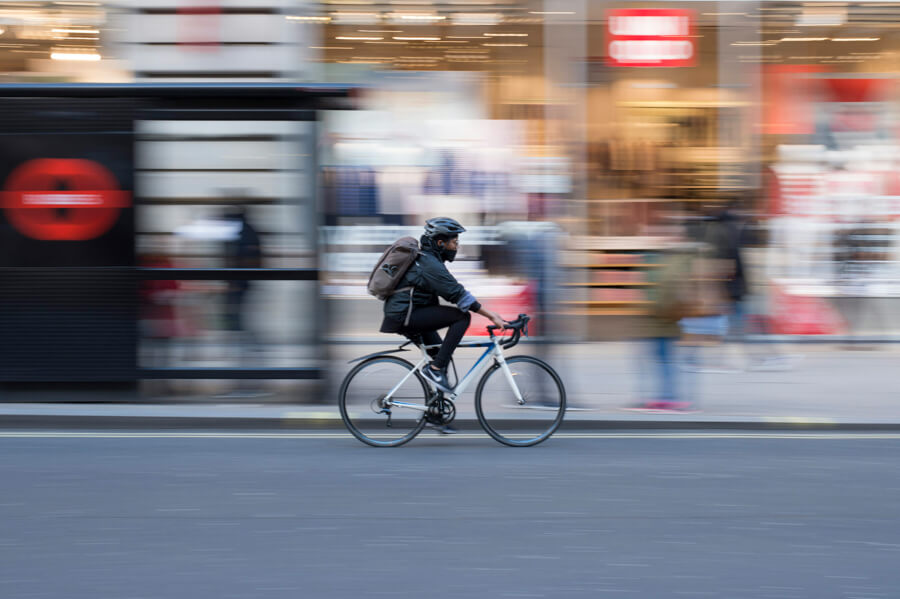
Panning
A lot of people forget about panning, but this style can give you the best of both worlds; slow and fast shutter speed worlds. It shows movement, but doesn’t make it “boring” or standard, the way we’re used to seeing all action images.
To get the panning effect, simply follow your subject with the camera while taking the picture. Everything else will appear blurred.
The biggest issue is finding out which shutter speed is needed; usually it’s between 1/15 and 1/60 for cars, bikes and dogs running. It’s a loooot of trial and error, but so worth it when you finally get it.
3. Is Aperture Priority Mode Better?
Yes, but only if your main goal is to blur the background, or make everything appear sharp.
For portrait photography, it’s much better to shoot in Aperture Priority mode. Since your subject isn’t moving, there’s not much difference between 1/250 and 1/1000.
Other examples would be landscape, weddings and macro. Anything where depth of field is super important to you.
In Shutter Speed mode, your camera only adjusts the aperture so your images don’t look too bright/dark. It doesn’t know if you want to blur the background or have everything sharp.
4. How to Shoot in Shutter Speed Priority
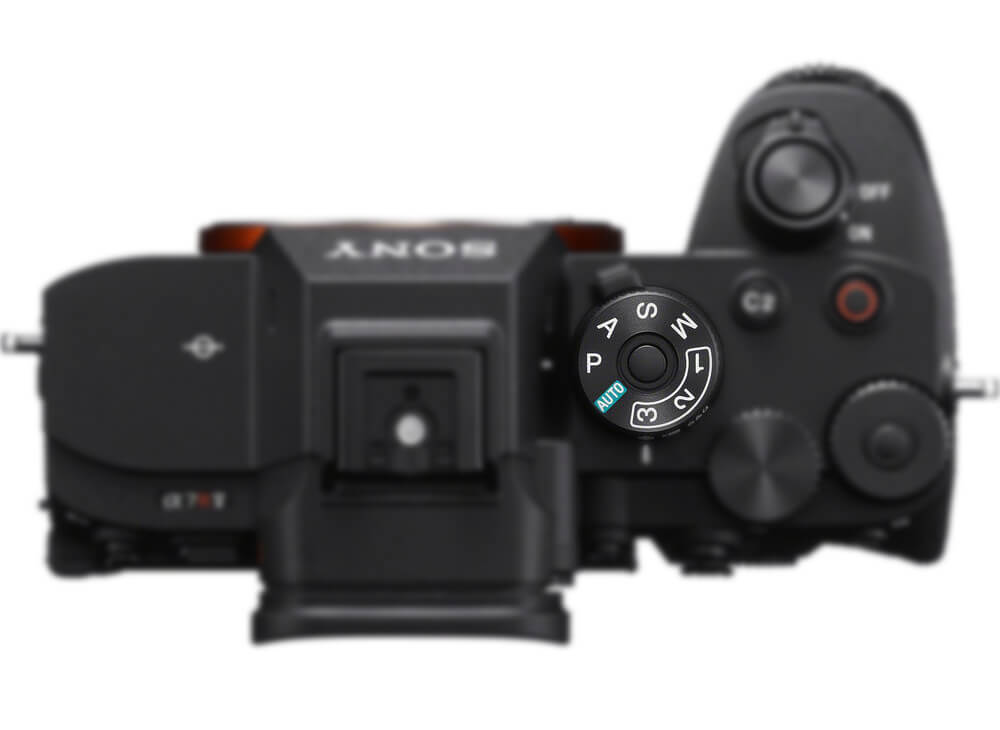
- Rotate the camera mode dial to T or Tv
- Find which dial/wheel controls the aperture (instructions/manual)
- Rotate the dial to both extremes (widest and smallest) to see all possible speeds
- Find out which button is set to Exposure Compensation
Most cameras have a front, top and rear dial. Their function can be changed, so you can actually customize the buttons as you like. I have my shutter speed set to the rear dial; the most convenient one for my thumb.
If you have a Fujifilm camera, most of them have a specific shutter speed dial with all values written on it.
5. Don’t Forget About Exposure Compensation & Metering
Even though you only control the shutter speed and let your camera do the rest, it can sometimes choose the wrong settings.
That’s where exposure compensation button/dial comes in.
It’s basically telling the camera “I like the settings you gave me, but make the image a bit darker or brighter”. You simply rotate the dial left/right in order to increase or decrease overall brightness.
Some cameras have a specific dial for exposure compensation, while others have a +/- button on the back.
When shooting in Shutter/Aperture Priority, the metering mode of your camera is also very important. It’s always calculating the best settings based on available light, but you can tell it to ignore certain parts of an image.
There are a couple of different modes; some look at your entire frame, while some only look at the light in the center. You can see more information in my metering guide here.
5. Choose Auto ISO
In both Aperture and Shutter Priority modes, your camera will automatically choose the best ISO.
I highly suggest you find the Auto ISO option and set the lowest and highest values. For most cameras, this is between ISO 100 and ISO 3,200. If you’ve got a full-frame camera released in the last ~5 years, feel free to set it up to ISO 6,400.
If you don’t do this, your camera will often choose a too high ISO value which will result in noisy images.
5 Comments
Heyy, pak92 is quite fun when bored. Decent amount of playtime. Give it a go with: pak92
Alright, for some serious action, check out qq88asia1. Top-notch platform if you want to get in on the games. Go see what qq88asia1 has to offer.
Great post. I am facing a couple of these problems.
636990 842478I like the valuable information you supply within your articles. Ill bookmark your weblog and check again here regularly. Im quite certain I will learn lots of new stuff right here! Greatest of luck for the next! 717515
Real excellent information can be found on weblog.