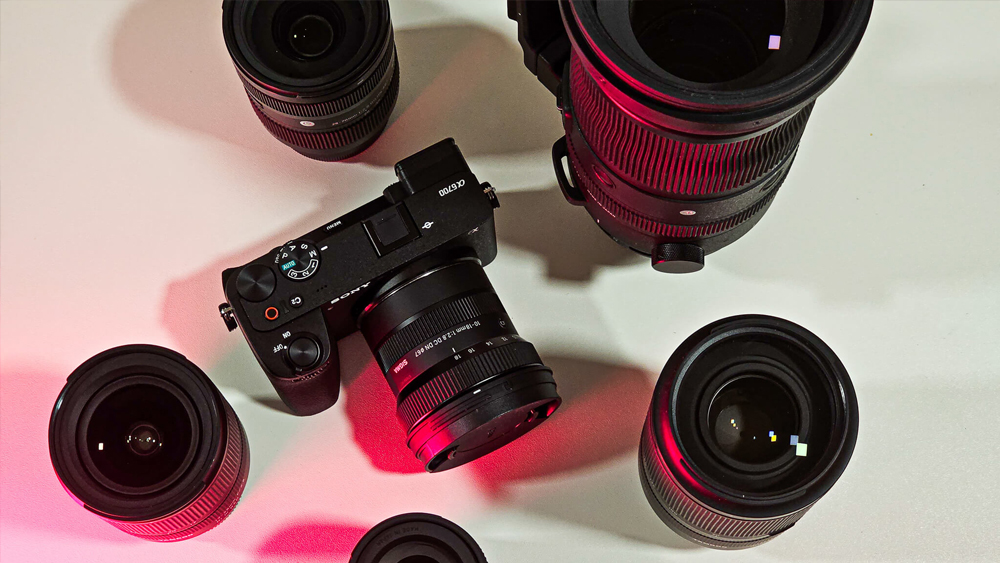
The Sony A6700 has an excellent 26MP sensor and auto focus that matches the performance of more expensive Sony cameras.
In this guide, I’m going to show you all the major settings you need to change if you want the best image quality out of your camera.
1. JPEG Settings for Highest Quality
For best image quality, I recommend shooting in RAW format.
However, not everyone has the time or knowledge to edit all of their images. JPEG files are edited by your camera and this includes sharpening, colors and contrast.
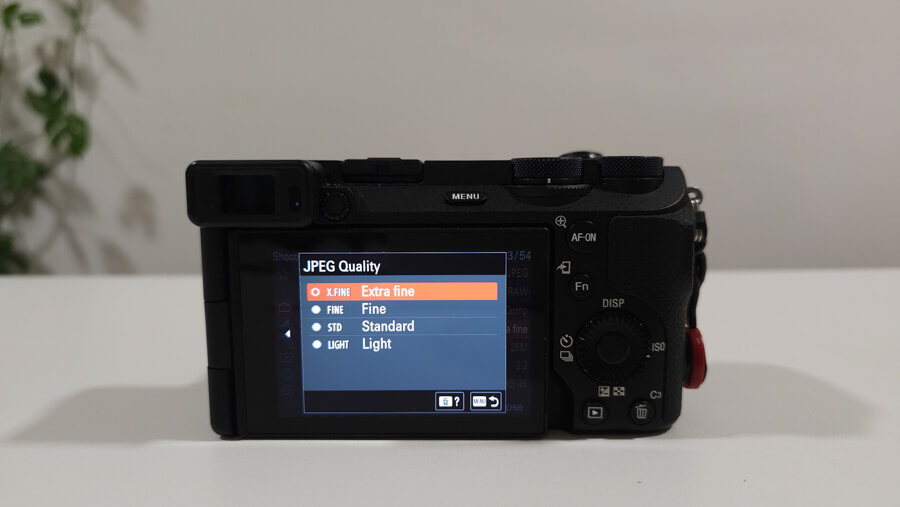
Head over to Shooting>Image Quality/Rec (red tab, page 7/58) and click on JPEG Quality.
- Choose JPEG (Extra Fine) for highest image quality.
By default, it’s set to Fine. You’re not getting the best quality.
There is also an HEIF option, which has the same image quality as JPEG but much smaller file sizes. Unfortunately many programs/apps are not fully compatible with it yet so I don’t recommend it for most people.
If you choose Light option, your JPEG files will get heavily compressed. This will result in smaller file sizes, but noticeably worse image quality.
2. RAW Settings for Highest Quality
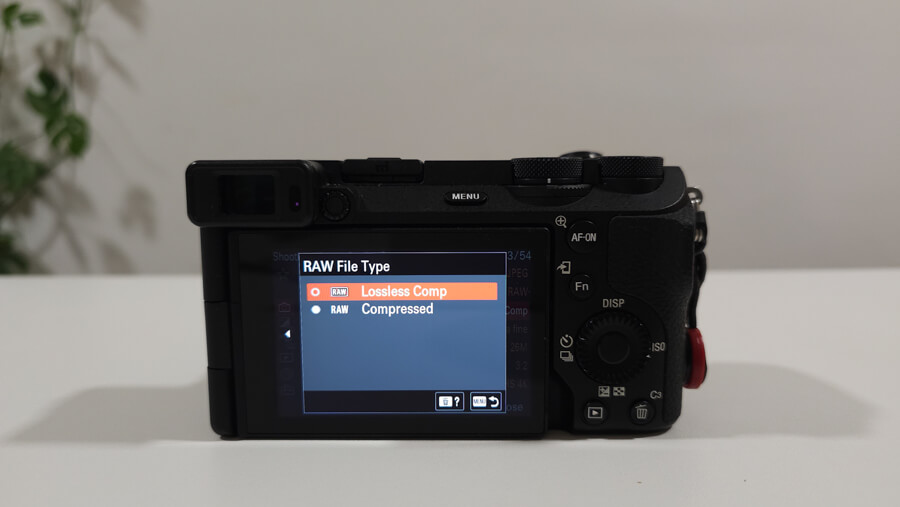
If you want complete control over your images, shoot in RAW format.
- Choose Lossless Compressed for highest image quality.
What’s the difference between the 2 modes?
- Compressed RAW – Some data is removed to make smaller file sizes. Your photos still contain a ton of information, but you’re not getting 100% out of it.
- Lossless Compressed RAW – The original file is also compressed but without losing any information at all.
The Sony A6700 is one of the first Sony’s cameras to support Lossless Compressed RAW.
It creates much smaller file sizes than Uncompressed RAW (not available with this camera) but doesn’t throw any information away. Therefore, this is easily the best RAW setting on any Sony camera.
Files are a little bit bigger than Compressed RAW, but for maximizing your shots I recommend you stick with Lossless.
RAW format does not apply any sharpening, saturation, contrast, noise reduction etc.. Everything needs to be done manually, or by applying custom presets. Don’t be discouraged if your images look worse compared to JPEG, it’s because you have not edited them yet.
Another big benefit of Lossless RAW is that your files are 14-bit when shooting in continuous mode. With Compressed RAW, they go down to 12-bit which means you’re losing a little bit information again.
If you want to see how many RAW files you can store on your A6700, check out our memory card storage calculator.
3. Limit Your Auto ISO
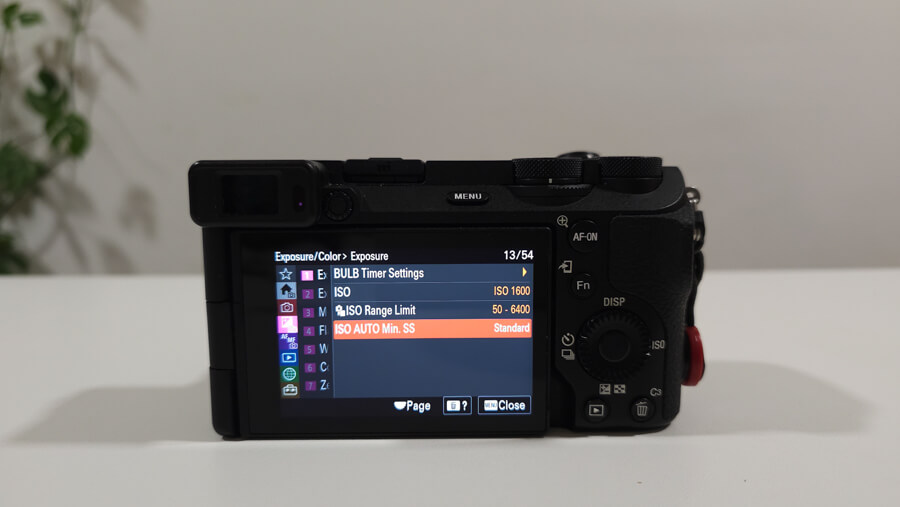 Navigate to Exposure/Color (purple tab, page 13/54) and scroll down to ISO settings.
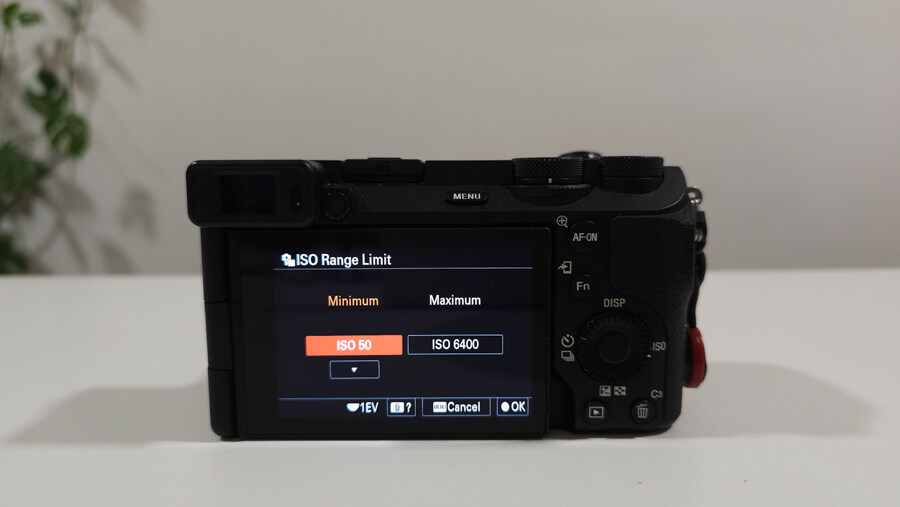
Click on ISO Range Limit and select the following ISO values:
- Minimum: ISO 50
- Maximum: ISO 6,400
Shooting in Auto ISO is highly recommended, especially if you don’t understand exposure.
However, the more you raise your ISO, the more noise appears on your images. This leads to lower image quality, less contrast, and visually less appealing photos.
You can simply limit your camera and make sure it never goes above ISO 6,400. The Sony A6700 has an APS-C sensor and it can’t keep up with full-frame cameras when it comes to noise. It’s great, but it’s not perfect. Even 6,400 is pushing the limit.
Read more: The 8 Best Lenses for Sony A6700 in 2024
Auto ISO is great regardless of which camera mode you’re shooting in.
4. Choose the Correct Metering Mode
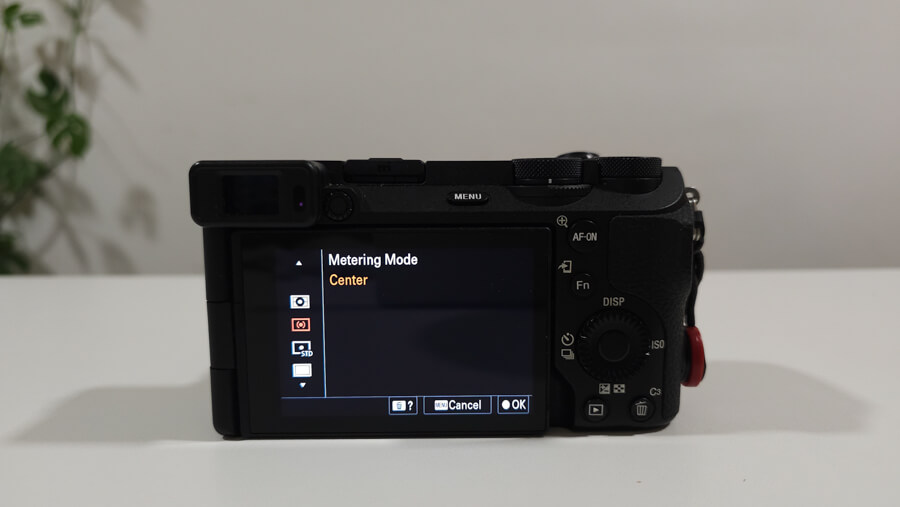
Sony A6700 has 5 different metering modes:
- Multi-Pattern
- Center-Weighted
- Spot
- Highlight-Weighted
- Entire Screen Avg.
You can see my full tutorial on metering modes for Sony cameras, but here’s a quick summary.
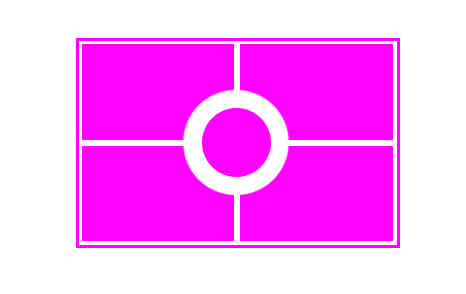
Multi-Pattern metering is the most versatile mode. It looks at your entire scene and tries to find the middle ground.
Your camera basically divides the entire scene into different zones and gives a little bit more priority to wherever your focus happens to be when taking a picture.
When it fails, your image may look too dark/bright.
That’s when you need to switch to any of the other modes.
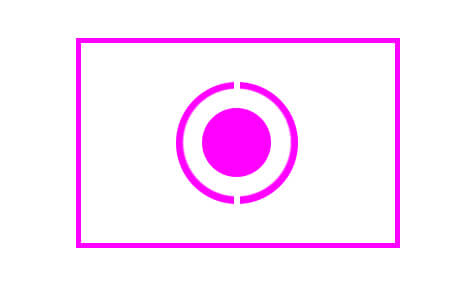
Center-Weighted: Ideal when your subject is in center and you’re shooting against a much brighter background. All of that extra light may confuse your camera which can result in an underexposed subject.
Spot Metering: Your camera will read the light that matches your current AF point. Great if you have a small subject anywhere in the frame (birds, products).
The other 2 modes are something I’ve never used, and don’t recommend you do either.
Metering modes are very important if you shoot in Shutter Priority or Aperture Priority modes because it helps your camera to select the best settings.
If you shoot in Manual, it’s not as important because you can directly control all settings.
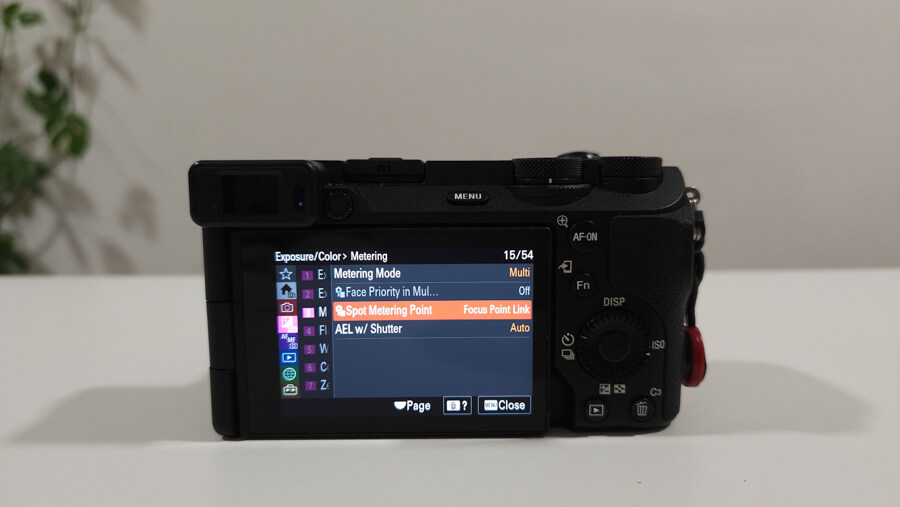
5. Link Your AF Point to Spot Metering
When shooting in Spot Metering mode, your A6700 uses a small portion of the center to measure light. This is not the optimal way.
Head over to Exposure/Color>Metering (purple tab, page 15/54).
- Choose Focus Point Link in Metering Menu
This way, your metering mode is directly linked to wherever your current AF point is.
It works for small, medium and large AF points. It’s ideal if you don’t always position your subject in center.
I always have this feature enabled and find it great for animals and product photography.
6. Limit Your Shutter Speed

This tip only applies if you shoot in Aperture Priority mode.
Head over to Exposure/Color>Exposure (purple tab, page 13/54).
- Select the minimum shutter speed = 1/30
When shooting in Aperture Priority, the A6700 can select a shutter speed that is slower than what you’d like.
This results in blur and lack of sharpness in your images.
The slower the shutter speed, the higher your chance of getting a shaky image. Having lenses with Image Stabilization helps, and the A6700 has it built-in as well.
By limiting your minimum shutter speed to 1/30, your chances of getting sharp images are way higher.
“Your shutter speed number should be higher than your focal length number.”
Remember this rule! If you’re shooting with a 50mm lens, make sure your shutter speed is at least 1/50.
Read more: Sony A6700: 15 Best Settings for Video
7. Turn off Noise Reduction
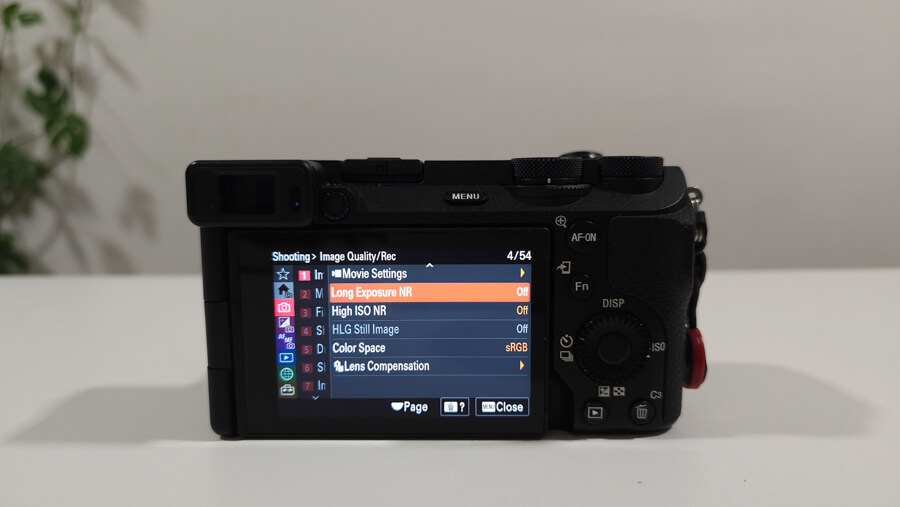
Your A6700 can apply noise reduction right after taking an image, but I recommend you turn it off.
Head over to Shooting>Image Quality/Rec (red tab, page 4/54).
- Long Exposure NR: Off
- High ISO NR: Off
Why should you turn it off?
If you shoot in RAW, it’s best you apply noise reduction in your preferred program. Lightroom is absolutely amazing when it comes to noise removal.
The A6700 is quite good with High ISO NR, but nothing beats doing it manually later. Your camera is as smart as the day it was released, whereas programs are constantly being updated with new algorithms.
Long Exposure NR is automatically applied when shooting with 1s+ shutter speeds. For astrophotography and sky images, turn it off and do all noise removal later. It will speed up the process of writing images onto your memory card. Here’s my full guide on Sony A6700 memory cards.
8. Choose the Correct Focus Mode
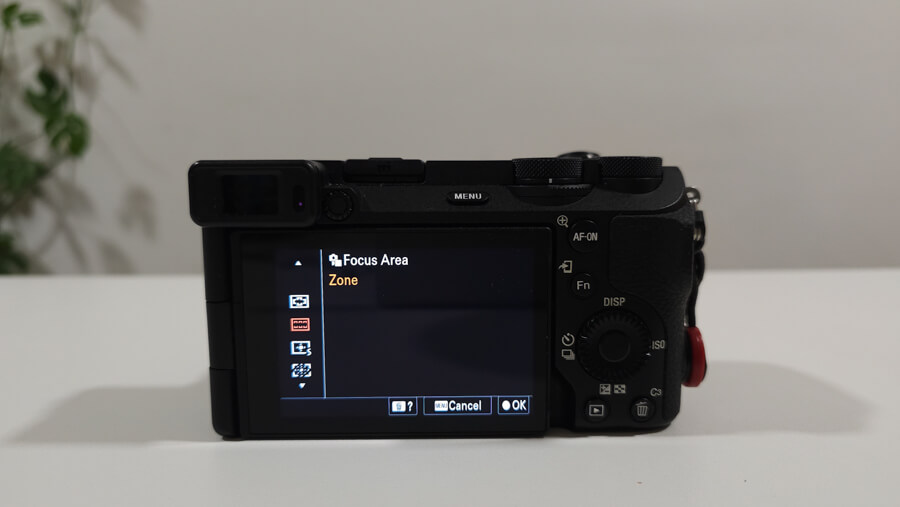
The Sony A6700 has many different focusing modes. These 4 are the most important.
- Wide
- Zone
- Spot (S, M, L)
- Manual
I highly recommend you to switch between them.
For example, when I’m traveling or doing quick shoots, I stick to Wide or Zone. I trust the Sony A6700 enough to make the right decision and it’s amazing and auto focusing.
Spot AF is my second favorite focusing mode.
You use the dial pad to move a single AF point around. You have 3 options; Small, Medium or Large. This depends on the size of your subject and how many distracting elements there are.
For portraits and slower subjects, this is the best way to get a tack sharp image.
When I do animal or bird photography, I’m in Spot AF for like 90% of the time. This is especially true if there are many branches or trees surrounding the animal, which makes the A6700’s job much harder.
By moving the AF point manually, you raise your chances of getting a sharp shot.
As soon as there’s less distracting elements, or my subject is moving quickly, I switch back to Wide AF and let the camera figure it out.
Sony A6700 has an excellent AI Recognition chip for people, animals, birds, insects and vehicles. Don’t forget change this setting before you start shooting.
9. Understand the Fundamentals
The quickest way to getting better images is by understanding shutter speed, aperture and ISO.
These 3 settings control the exposure/light.
By having a good enough understanding of how they all work together, it will allow you to get more creative control over your images.
- Shutter Speed: Controls how much light hits the sensor. It can freeze a moving subject, or make it appear blurry and give an illusion of movement. Values are between 1/4000 and 30 seconds.
- Aperture: Controls how much light goes through the lens. It can make your background blurry, or everything razor sharp. Values are between f/1.2 and f/32.
- ISO: Controls how sensitive to light your sensor is. It can make your images brighter, but may introduce lots of unwanted noise. Values are between ISO 50 and 102,400,
We have beginner friendly tutorials for all of these. I promise you that after reading them, you will instantly have a better understanding of how they affect your photos.
For example, every lens has an aperture sweet spot where images look the sharpest. Usually, that’s not at its largest opening, but somewhere in the middle.
If you want to control all 3, you will have to shoot in Manual. Since this can be quite scary, I recommend you to start with Aperture/Shutter Priority modes and see how it feels.
Many professional photographers stick to these 2 modes and never shoot in Manual. Both options are perfectly fine, but it helps to at least know how these 3 settings change your image.
10. Press “Trash/C3” Button for an Explanation
![]() Don’t know what a certain setting or function does?
Don’t know what a certain setting or function does?
- Press the Trash/C3 button.
This works for all menus and settings you will find in the A6700. It’s a hidden feature, but extremely useful for really getting to know your camera.


